Tomato
 Tomato: Lycopersicon, lycopersicon
The tomato plant’s wild relatives have their origin in South America from Chile along the Andes up to Ecuador. However the domestication of the tomato was centered around Mexico from early times by the Aztecs. The tomato was brought to Europe in the 1500 hundreds but was only grown as an ornamental plant avoiding it as a food crop. However once it gained acceptance for culinary purposes it became more popular and today it is one of the more important food crops grown in diverse climates throughout the world.
Flower biology: Tomato varieties are perfect flower plants which carry stigmas and pollen in the same flower. The flowers are predominately yellow regardless of the colours of its fruits .
Pollination: Tomatoes are self pollinated and wont readily cross with other cultivated varieties.
However having said that, older varieties of heirlooms and varieties in their native environment will out cross more readily because the stigma protrudes out beyond the anther cone
making them more susceptible to taking up pollen from other varieties. Tomato is an annual plant flowering and producing seeds in the same year.
Isolation distance. Since the tomato is a self pollinated crop only relative short isolation distances are needed. Depending on cultivars the isolation distances vary from 15 meter down to a couple of meters between modern varieties and between 23 and 45 m between heirloom cultivars. The distance between two greenhouses is also sufficient separation between two tomato varieties.
Minimum number of plants. Maintaining genetic diversity is relatively straight forward harvesting fruits from two to three plants of the more modern varieties. The more plants the better. For heirloom varieties harvesting from as many plants as is possible should ensure biodiversity of a given cultivar. However some home growers claim to only save seed from a couple plants and find no immediate changes to their varieties. Best practice should always be to save seed of as many plants as possible.
Crop characteristics: There are two types which we cultivate. The determined or bush type tomatoes and the in-determined which are the vines which need staking or string to support them. The characteristics vary a lot in tomatoes between beef and plum types to very small cherry type tomatoes and it is important to maintain the true to type traits associated with each variety which you are growing for seed. Further traits such as early flowering, leaf size, shape and dark or light leaf colour, how many leaf nodes between trusses, the colour and shape of the tomato and the flavour all need to be considered
Agronomy. Good seed depend on good crop production and good crop production depends on suitable soil, soil moisture and soil preparation. Tomatoes like a rich and free draining soil. Usually a crop is sown in trays then pricked into pots before being transplanted into a green house or outside. Sow early in the season to get a good head start. The plants require support and regular watering. A feed of comfrey tea helps with the tomatoes potassium requirement.
Positive selection; Already at seedling and first true leaf stage is it possible to select for the earliest sturdiest and most vigorous looking seedlings. Then select again at point of final trans plant into the greenhouse for the same traits.
Flowering: The tomato flowers require airflow and visitation of insects to help trip the flowers to pollinate. A gentle tapping of plants mid to late morning also helps to release the pollen. Seed set for most varieties depend on warmth for ability of pollen to shed. The ideal temperatures need to be in the region of above 16 degrees C and below 32 degrees C for the pollen grains to fertilise with the ovary. Too varying day and night temperatures may affect ability of the pollen to travel to the seed bud or ovary to set seed, which can result in poor seed set. The period from fertilisation to ripe fruit is between 40 – 60 days.
Fruit harvest: Harvest only the fruits which show true to type characteristics, harvesting from the healthiest and best producing plants. Allow the tomatoes to fully ripen, even over ripen, but not to rot.
Seed extraction: The tomato seeds are also called wet seeds as supposed to dry seeds like lettuce. The tomatoes are cut crossways in half and the gelatinous seeds are scooped out with a spoon into a container. 50% water can be added to make the mixture more liquid. The pulp mixture then needs to sit and ferment in a warm place for between 2 – 4 days depending on temperatures. The object of this is to dissolve the gelatinous sack surrounding the seeds and the natural fermentation does that by developing a mould on top which needs to be stirred in twice a day. This frees the good seeds to fall to the bottom.
Seed extraction 2: Once the fermentation is complete the pulp which floats on top is gently poured off. The process is repeated several times adding water each time to dilute the pulp mixture until all pulp has been poured off and with the seeds having settled to the bottom. The seeds then need to be dried rapidly. They are put on drying trays or racks in a warm and ventilated space and need to be stirred regularly and rubbed to prevent them from sticking together. The rapid drying is necessary to prevent unwanted germination. Once the seeds are sufficiently dried they need to be stored in paper bags or envelopes and labelled clearly.
 Tomato seeds will store well up to 4 years and there is on average 300 – 400 seeds to the gram.
Seed yield vary but can be between 20 – 30 gram per sq meter of more modern varieties.
For more in detail information see also:
The Organic Seed Grower by John Navazio. ISBN 978-1-933392-77-6
* seed cooperative. www.seedcooperative.org.uk
Lettuce
Lettuce: Lactuca Sativa from  the latin lac or milk and sativa meaning cultivated. The lettuce probably stems from the wild type Lactuca serriola which is found throughout southern Europe, Asia and North Africa. It was used already in ancient Egypt and was popular with the romans who used it for medicinal purposes and who also brought it to the British isles. By the 16th century head lettuce had been developed and by the 17th century various types had appeared including the known oakleaf and different shades of green and red lettuces. Today it is a very important and popular crop.
Flower biology: Lettuce varieties are perfect flower plants which carry stigmas and pollen in the same flower. The flowers are predominately yellow.
Pollination: Lettuce are self pollinated and wont readily cross with wild and other cultivated varieties. During anthesis ( maturation of anthers and stigma’s) the flower is closed leaving only part chance for any crossings between varieties. Lettuce is an annual plant flowering and producing seeds in the same year.
Isolation distance. Since lettuce is a self pollinated crop only short isolation distances are needed. Generally speaking a few meter’s between varieties is necessary when another flowering crop is separating them.
Minimum number of plants. Maintaining genetic diversity is relatively straight forward selecting a good 2 – 3 plants. However it is always advisable to grow seed of more plants.
Crop characteristics: There are five types which concern us in our northern climates. These make up head lettuce of butter head, crisp head and batavia which are known for the forming of ‘heads’ with degrees of firmness: Coz or Romaine lettuces are known for their smaller and more compact sizes and loose leaf lettuce for the type where individual leaves can be harvested. It is important to adhere to the individual true to type characteristics associated with each kind of lettuce variety.
Agronomy. Good seed depend on good crop production and good crop production depends on suitable soil, soil moisture and soil preparation. Lettuce can be sown direct in the soil or in trays to be transplanted later. Sowing direct requires being able to get onto the soil relatively early in the season. So an early sowing in trays is recommended seeing that lettuce is an annual, requiring sufficient time to go through both the vegetative and reproductive stages in one growing season. Sowing in trays and transplanting will allow the full development of the actual lettuce and time for the lettuce to bolt and produce flowers and seeds.
Positive selection: Already at seedling or 4th to 6th leaf stage can the first selection be made on germination vigour and true to type plants. The second point of selection is at lettuce harvest time choosing only the best and healthiest growing and true to type plants. Any lettuce, which show signs of disease and too early bolting should be pulled or rouged out. The selected plants are then dug up with a good deal of soil round the roots and transplanted into a greenhouse or to another outdoor prepared site. The planting needs to be 30 – 45 cm between plants in the row and 76 – 90 between rows. Overhead watering can be used during the vegetative stage shifting later to drip feed irrigation during the reproductive stage so as not to causes loss of seeds. Also hoeing should be shallow around the roots since these lie close to the surface and are easily disturbed. Positive selected plants yield elite seeds.
Emergence of seed stalk: It may take a while for the seed stalks to break through especially on head lettuce and there are different methods which can be used to encourage the proper bolting process. Making a cut in the form of a cross on top of the lettuce with a sharp knife aids the stem to break through. (This is called lancing). Also removing several layers of leaves from a crisp head variety is common to allow the center shoot to push its way through.
Support: Place strong canes at either end of each row and every 6 ft in the row. Depending on variety some plants may require individual canes with string tied round the whole plant.
Seed harvest: The flowering of lettuce can go on for several month as the flowers are in-deter minate. This means the seeds mature accordingly being mature about 2- 3 weeks after flowering. The best seeds come from the early flowers and seed harvest is done manually over several weeks starting usually in late August. The mature seeds produce little light feathers which is a sign that the seeds are ready to ‘shed’. The first seeds are harvested by bending the plant gently and shaking the seeds into a paper or cotton sack. This is done several times and when about 50 % of the seeds are mature the plant is cut and brought to dry under cover on drying racks or laid out on a plastic cover like mypex.
Threshing: The seeds are beaten off the stems into sacks and a fine mesh can be used to sieve the material separating the seeds from the feathers. Since the seeds and the stem and feather material weighs the same a careful job is required of the sieving. For larger scale and bulk seed cleaning the seeds are run through a seed cleaner. When growing larger seed quantities SC* can help to facilitate bulk cleaning and grading. Once seeds have been cleaned and graded they should be stored in paper bags and labelled well.
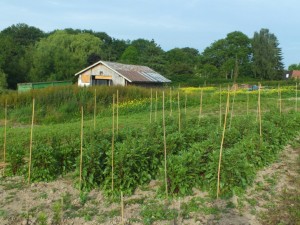
 Seed to seed method. The lettuce crop is raised as for positive selection. Instead of selecting positively for the elite plants, a negative selection of rouging out any inferior and slower to grow plants is carried out including early bolters. 10 – 20 % of the crop is rogued at the cut off point of harvest with the remaining best plants standing in situ. In this way no transplanting to another location is needed. The crop can as well be raised outdoor as in a greenhouse but it is important if raising a crop out doors to erect a structure over the crop to prevent the flowers and seeds from being rained on, which will impair the seeds. (See photo.)
The seed to seed method will give standard seed which is what is sold in seed packets.
There are 1000 seeds to the gram. Seed yield pr sq meter from 50 – 70 grams.
For more in detail information see also:
The Organic Seed Grower by John Navazio. ISBN 978-1-933392-77-6
*SC: www.Seed Cooperative.org.uk
Runner Beans
 Runner Beans: Phaseolus coccineus
Runner beans have their origin in Mexico and the central Americas and have been known as a food crop for well over 2000 years. They have a mention in a 17th century publication to have been grown as ornamental plants in England. Today runner beans with their impressive colourful flowers are an invaluable and much loved garden crop. There are also a number of string less varieties available on the market and it is a crop which many enjoy to save for harvesting seeds. A reflection of this can be seen by the many home grown varieties which are swapped up and down the country at the UK’s annual February and March seed swaps.
Flower biology: Runner beans are perfect flowers which carry stigmas and pollen in the same flower. Flower colour varies from scarlet red to white and a pink and white like the Pink Lady.
Pollination: Runner bean flowers are self-fertile but need insects to trip (release) the pollen and rupture the stigma to grow the pod and set seeds. They will quite readily cross pollinate with other runner beans and one should look upon them as semi cross pollinators. In the wild they are perennial since their bulbous roots will grow biannually if unharmed by frost. Their roots can be dug up after harvest and stored moist over winter and replanted in spring. However in our climate we tend to treat them as annuals since we usually sow them afresh each season.
Isolation distance. Although beans are self fertile they can cross pollinate up to 40% and therefore they need a minimum distance of 150 – 200 meters between two or more varieties with other flowering crop species growing between the two varieties.
Minimum number of plants. It is important to maintain the genetic diversity of the different traits of runner beans always keeping an eye on the individual plants. Since growing a bean crop usually involves more than 30 plants this number is easily sufficient to maintain genetic diversity as the bean flowers are self pollinated.
Minimum number of plants. It is important to maintain the genetic diversity of the different traits of runner beans always keeping an eye on the individual plants. Since growing a bean crop usually involves more than 30 plants this number is easily sufficient to maintain genetic diversity as the bean flowers are self pollinated.
Crop characteristics: There are quite a number of different runner bean varieties on the market and although the beans will produce true to type plants it is nevertheless important to recognise what individual traits the crop is known for. Something quite obvious is the flower and seed colour. Also selecting for string less ness is required if a variety is known for this characteristic.
Agronomy. Good seed depend on good crop production and good crop production depends on suitable soil and soil preparation. Beans like compost and moisture and will respond well to evening watering in the form of a gentle shower. This will also help to set more flowers.
Positive selection: It is possible to positive select for the best performing plants. When growing one plant pr cane or string it is easy to look more carefully for characteristics at single plants. Mark with coloured labels the plants you wish to save seed from and make sure no one else will harvest them for culinary purposes. Keep the seed separate from the remaining seed which you will harvest and label clearly your selected seeds and store dry. Remember that seeds are mostly dry matter and will need equivalent dry storage. The specially selected seeds are elite seeds.
Crop support: The crop needs support with canes or string as suits the grower and the planting can be 25 – 30 cm between plants in the row and 90 cm between rows.
Rouging: Any plants which fail to grow well, are slow to get going or which look weak or are aphid insect infested should be pulled out and discarded before flowering. This is called rouging.
Flowering and Seed harvest: During June and July the crop will continue to flower, with the first seeds maturing from the bottom up. The first seed harvest can start in late August depending on location, with manual harvesting taking place over several weeks. An indication of seed maturity can be seen by pods turning brown. Lay the seed pods to dry on drying frames.
Threshing: Once seed pods have dried the seeds can to be threshed. This can be done by hand, wearing gloves and crunching the pods in a large tub. On a windy day the crushed pods and seeds can be winnowed by pouring the material into a second tub allowing the wind to blow away the rubbish. Another method is to fill a paper sack ¼ full, lay it on the ground and tread lightly back and forth on the sack crushing the pods. For bulk* quantities a seed thresher is used to deal with larger quantities.
Grading: Small and cracked seeds can easily be sorted by hand. When growing larger seed quantities SC* can help to facilitate bulk threshing and grading. Once seeds have been cleaned and graded they should be stored in paper bags and labelled well.
There is 1 seed pr gram and seed yield vary from 60 – 90 grams pr square meter.
For more in detail information see also: The Organic Seed Grower by John Navazio. ISBN 978-1-933392-77-6
*SC; www.seedcooperative.org.uk
Beetroot
 Beetroot: Beta vulgaris. The beetroot has its origin along the Mediterranean coast lines where it presumably was cultivated from the sea beet. It was cultivated by the ancient Greeks and Romans who used the leaves for culinary purposes and the roots medicinally. The root colours were yellow and white and it was only after 1550 that there was first mention of the swollen roots. The red beet as we know it today was first mentioned in the 17th century. Only by the 19th century were the tapered and globe shaped roots widely cultivated in Europe.
Flower biology: beetroots are perfect flower plants which carry stigmas and pollen in the same flower. They are protandrous meaning the pollen is mature several days before the stigma is mature.
Pollination and seed formation: Beetroot is cross and wind pollinated but will also be pollinated by insects and will cross with any of the other cultivated Beta Vulgaris crops like beetroots, sugar beets, and fodder beets. They produce multigerm clusters from 2 – 5 seeds pr cluster. Beetroot are biennial flowering in their second year.
Isolation distance: Because of the distances the pollen can travel, ideally a distance of 1600 meters should be observed between different flowering beetroot crops and double this space between different types of beta vulgaris species.
 Minimum number of plants. There is some debate about the number of plants required to maintain genetic diversity. But a minimum of 20 – 30 for home grown situations and 120 for professional seed growing is to be recommended, however always the more the better.
Crop characteristics: There are many types of beetroot ranging from the globe shaped to the cylindrical to the tapered. There is also variation to the leaf colour and maturation times. It is therefore important to maintain the characteristics that are true to type of the crop which you grow.
Agronomy. (Year 1) Good seed depend on good crop production and good crop production depends on suitable soil and soil preparation. The beetroot crop should be raised as any commercial crop for the market ensuring that the roots manage to reach proper maturity.
Positive selection: At harvest time positively select the best and most true to type roots selecting also for smooth skin texture. Twist off or cut leaves at 2 cm above growing point. Positive selected plants give elite seed.
Storage: Then store the roots in moist cool conditions, sand is ideal. Make sure to label clearly your selected roots or sacks / crates of roots. Discard damaged or rotting beetroots during storage.
A Further selection can take place during storage which involves cutting a wedge to check for inner colour and taste. Then dip in wood ash to help heal the wound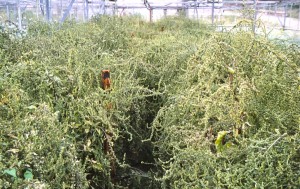
Greenhouse: (Year 2) After storage around March/April depending on weather conditions, the beetroots can be planted out planting the roots firmly into the soil with tops being at ground level. Planting distances should be 30 cm apart in rows and 75 – 90 cm between rows.
For outdoors: Plant in the same way as indoor crops, when the soil is warming up, usually a few weeks later.
Crop support: When the shoots are growing the crop will need supporting. Place 5ft stakes or canes at the end of each row and at 6 ft intervals in the row. Then tie several rows of string or wire along the outside of the crop to keep stems supported and off the ground.
Rouging: any plants which fail to grow well, which look weak or are insect infested should be pulled out and discarded before flowering . This is called rouging.
Flowering and Seed harvest: During May and June the crop will flower, and the first seed harvest can start in August depending on location, with manual harvesting taking place over several weeks as the crop doesn’t mature all at the same time. An indication of seed maturity can be seen by seeds turning brown starting from the bottom of the stem and maturing upwards. The seeds are also bigger at the base of stems and smaller at the top. Use secateurs to cut off seed stems and harvest into paper sacks or builder bags. Do this with care as seeds will easily shatter or fall off. Lay seed stems to dry on drying frames or on plastic sheeting in a warm, dry and airy place. Keep harvesting all seed stems as they mature. The entire beetroot seed crop can be harvested in one go once about 60% of the seed crop has matured. The harvested crop is then left to dry further indoors.
Threshing: Once seed stems have dried the seeds need to be separated from the stem material. This can be done manually and quite successfully by wearing gloves stripping the seeds from the stems.
Cleaning: Once the seeds have been threshed they need to be cleaned. Using a small fan can help to winnow the seeds by pouring the seeds from one container into another with the fan blowing away the residual leafy and stem material. Then sieve the seeds carefully using meshed sieves to separate out small seeds and bits of soil and rubbish. For larger scale and
Bulk seed cleaning SC* can help to facilitate bulk cleaning and grading.
Storage: Once seeds have been cleaned and graded they should be stored in paper bags and labelled well. Seeds are mostly dry matter of up to around 85 % and it is therefore important that the seed storage is dry and cool to keep the seed from drawing in moisture. Beetroot seeds can be kept up to 5 years if stored well. After 3 years a simple germination test can be made counting 100 seeds with each seed representing 1% to ascertain the seeds viability.The seed yield pr square meter is aprox. 70 – 90 grams and there are approximately 50 – 70 seeds. to the gram.
For more in detail information see also: The Organic Seed Grower by John Navazio. ISBN 978-1-933392-77-6
*SC; www.seedcooperative.org.uk
Swiss chard
 Swiss chard: Beta Vulgaris.
The chard was probably originally cultivated for its broad leaves and later its wide stems and was popular already in old roman times. The crop which has its origin around the Mediterranean coastlines was brought northward into Europe where it has been cultivated ever since.
Flower biology, Chard’s are perfect flower plants which carry stigmas and pollen in the same flower.
Pollination and seed formation: Chard is cross and wind pollinated but will also be pollinated by insects and will cross with any of the other cultivated Beta Vulgaris crops like beetroots, sugar beets, and fodder beets. They produce multigerm clusters of up to 5 seeds pr cluster. Chard are biennial flowering in their second year.
Isolation distance: Because of the distances the pollen can travel, ideally a distance of 1600 meters should be observed between different chards varieties and double this space between different types of beta vulgaris species like the sugar beet and the beetroot.
Minimum number of plants. There is some debate about the number of plants required to maintain genetic diversity. But a minimum of 20 for home grown situations and 50 for professional seed growing is to be recommended, however always the more the better.
Crop characteristics: Swiss Chard is known for its big leaves and usually its wide stems or petioles so it is important to maintain those characteristics. There are varieties which have smaller and lighter coloured leaves and narrower stems.
Agronomy. (Year 1) Good seed depend on good crop production and good crop production depends on suitable soil and soil preparation. Ensure in year one that the crop grows to display a proper crop. Ideally your crop should supply you with good leaves as you would expect it to do.
Positive selection: To obtain the best seed production results it is advisable to sow later in the season around early to mid July using elite* seed. This will give a good standing crop before winter and minimise plants bolting. For positive selection one should select out the best producing plants and transplant them into a prepared site making sure the roots are well surrounded by soil and then water well after planting if required.
Storage, in cold conditions the plants can also be lifted then trimmed to 2 – 3 inch above crown / growing point and stored in the greenhouse covering them with straw or sacks, making sure the roots remain moist throughout.
label clearly your seed plants, and let others working with you know those plants have been selected for seed. Discard any damaged or rotting plants during storage.
Year 2: During the following March / April plant out the stored chard plants in bed form, 45 cm apart in rows and 60 cm between rows with 90 cm between beds.
Crop support: The seed crop can grow up to 6ft high. In May when the plants have taken and started to bolt errect support with 6ft stakes or strong canes at each end of the bed and at 6 – 8 ft intervals in the row. Then tie several rows of string along the outside of the crop to keep stems in and supported to avoid the crop from trailing on the ground.
Flowering and Seed harvest: During June the crop will continue to flower, and the first seed harvest can start in August depending on location, with manual harvesting taking place over several weeks as the crop doesn’t mature at the same time. An indication of seed maturity can be seen by seeds turning brown starting from the bottom of the stem and maturing upwards. The seeds are also bigger at the base of stems and smaller at the top. Use secateurs to cut off seed stems and harvest into paper sacks or builder bags. Do this with care as seeds will easily shatter or fall off. Lay seed stems to dry on drying frames or on plastic sheeting in a warm, dry and airy place. Keep harvesting all seed stems as they mature. The entire chard seed crop can be harvested in one go once about 60% of the seed crop has matured. The harvested crop is then left to dry further indoors.
Threshing: Once seed stems have dried the seeds need to be separated from the stem material. This can be done manually and quite successfully by wearing gloves stripping the seeds from the stems.
Cleaning: Once the seeds have been threshed they need to be cleaned. Using a small fan can help to winnow the seeds by pouring the seeds from one container into another with the fan blowing away the residual leafy and stem material. Then sieve the seeds carefully using meshed sieves to separate out small seeds and bits of soil and rubbish. For larger scale and bulk seed cleaning SC** can help to facilitate bulk cleaning and grading.
Storage: Once seeds have been cleaned and graded they should be stored in paper bags and labelled well. Seeds are mostly dry matter of up to around 85 % and it is therefore important that the seed storage is dry and cool to keep the seed from drawing in moisture. Chard seeds can be kept up to 10 years if stored well. It is advisable however after 5 – 6 years to run an annual germination tests counting 100 seeds with each seed representing 1% to ascertain the seed viability.
Elite seeds* are seeds from positively selected plants and should be used for elite seed or standard seed production.
Seed to seed method: In the situation where the crop will be over wintering in the ground it is necessary to rogue out the smaller, inferior not true to type and diseased plants. Then in the following April / May do the same again. This will leave the best plants to go to seed. This form of selection is called negative selection and the method used is called rouging. Rouging should take place before flowering. Seed produced from the seed to seed method is called standard seed and is what is generally sold in seed packets.
The seed yield pr square meter is aprox. 60 – 80 grams and there are approximately 50 – 70 seeds to the gram.
For more in detail information see also: The Organic Seed Grower by John Navazio. ISBN 978-1-933392-77-6
**SC: www.seedcooperative.org.uk
Carrot
 Carrot: Daucus carota has its origin in Afghanistan and was gradually introduced into Europe in the early to middle ages. The original colours of carrots were white, yellow and purple and only in the 17 hundreds did the first orange types appear in Holland.
Flower biology, Carrots are perfect flower plants which carry stigmas and pollen in the same flower.
Pollination: Carrots are cross and insect pollinated and will cross with wild and other cultivated carrots. They are biennial flowering in their second year.
Isolation distance: Ideally a distance of between 800 – 1600 meters should be observed between two different flowering carrot crops. However, Using cage systems* allows for more than one crop to be grown in close proximity.
Minimum number of plants. There is much debate about the number of plants required to maintain genetic diversity in carrots. But a minimum of 25 for home grown situations and 100 – 200 for professional seed growing is to be recommended, though the more the better.
Crop characteristics: Carrots come in different shapes and sizes so it is important to know from the outset whether your crop is a Nantes, Berlicum, Chantenay or Autumn king type as each type will mature at different times and carry their own particular characteristics. Some of the early crops will mature around 90 days whereas 150 days are needed for main and storage crops.
Agronomy. (Year 1) Good seed depend on good crop production and good crop production depend on suitable soil and soil preparation. Ensure in year one to produce good roots which have been allowed to reach maturity.
Positive selection: At harvest time positively select the best and most true to type roots selecting also for smooth skin texture and avoid rounded shoulders. Twist off or cut leaves at 2 cm above growing point.
Storage: Then store the carrots in moist cool conditions, sand is ideal. Make sure to label clearly your selected roots or sacks / crates of roots. Discard damaged or rotting carrots during storage.
A Further selection can take place during storage which involves cutting the bottom 20% off to check for core size which should be medium sized and core colour which should aim to match with the outer colour. Select also for taste discarding bitter and rough tasting roots by tasting the 20% cut off pieces.
 Greenhouse: (Year 2) in the following spring plant the stored roots in March / April so that the shoulders of the carrots are level with the ground. Planting distances should be 20 – 30 cm apart in rows and 60 – 75 cm between rows.
For outdoors: Plant in the same way as indoor crops, when the soil is warming up, usually several weeks later.
Crop support: When the shoots are growing and in May when the first flowers appear, support the plants with 5ft stakes or canes at each end of the bed and at 6 ft intervals in the row. Then tie several rows of string along the outside of the crop to keep stems supported.
Rouging: any plants which fail to grow well, which look weak or are insect infested should be pulled out and discarded before flowering . This is called rouging.
Seed harvest: During June and July the umbels upon which the seeds grow, will mature the seeds and in August harvesting takes place over several weeks. Usually the primary umbels mature first and should be bronze brown in colour. These umbels are called the ‘kings head’  and carry bigger and better seeds. Use secateurs to cut umbels with about 3-4 inch of stem into paper sacks. Lay seed heads to dry on drying frames in a warm, dry and airy place. Keep harvesting all umbels as they mature. Keep primary umbel seeds separate for elite seed use. The entire carrot seed crop can be harvested in one go once the secondary umbels have matured. The crop is then left to dry further indoors.
Threshing: Once seed heads have dried the seeds need to be separated from the stem material. Threshing can be done by rubbing the umbels over a fine mesh screen.
Cleaning: Run seed over a smaller sieve to get soil and other debris out. Carefully winnow the seeds to separate chaff from seed. For larger scale seed growing de-bearding should be done (as carrot seed has small hairs) to prevent seeds sticking together when sowing. When growing larger seed quantities SC** can help to facilitate bulk cleaning and grading. Once seeds have been cleaned and graded they should be stored in paper bags and labelled well. Seeds are mostly dry matter of up to around 85 %. It is therefore important that the storage is dry and cool to keep the seed from drawing in moisture. The seeds will keep well for 3 years.
*Cage system. It is possible to grow several carrot seed crops in close proximity by erecting a cage over the crop. Fine environ mesh is used for the cage and bumble bee hives or blow flies are placed in the cage and used to pollinate the crop. It is important to ensure no other flying insects can get in, checking that the netting is secure all round, as this will otherwise cause cross pollination of pure line varieties.
Elite seeds are seeds from positively selected plants and should be used for elite seed production. There are approximate 1000 carrot seeds pr gram. A carrot seed crop can yield between 60-120 grams of seed pr sq meter depending on variety.
For more in detail information see also: The Organic Seed Grower by John Navazio. ISBN 978-1-933392-77-6
**SC: www.seedcooperative.org.uk
Parsnip
 Parsnip: Pastinaca Sativa
The parsnip has its origin in the Mediterranean regions and was in Greek and roman times cultivated for both food and medicine. By mid sixteenth century its cultivation was widespread in Europe only then later to be replaced by the potato.
Flower biology: Parsnips are perfect flower plants which carry stigmas and pollen in the same flower. Flowers are greenish yellow producing nectar attracting the insects.
Pollination: Parsnips are cross and insect pollinated and will cross with wild and other cultivated varieties. They can also cross with themselves. They are biennial flowering in their second year.
Isolation distance. Ideally a distance of between 800 – 1600 meters should be observed between two different flowering parsnip crops, however in more sheltered areas with hedges, trees and other barriers, a shorter distance of 800 meters can be used. Using cage systems* allows for more than one crop to be grown in close proximity.
Minimum number of plants. It is important to maintain the genetic diversity of the many different traits of parsnips. But a minimum of 20 plants for home grown situations is to be recommended. For professional seed growing 50 plus plants would be recommended, however the more the better.
Crop characteristics: There are not nearly as many parsnip types as carrots types, but none the less it is important to pay good attention to the root shapes, skin smoothness and sizes, root colour, leaf stand and disease resistance, especially canker. As with carrots it is important to know from the outset the variety you are growing. Remember you can-not save seed successfully from F1 hybrids to give you ‘true to type’ roots.
Agronomy. (Year 1) Good seed depend on good crop production and good crop production depends on suitable soil and soil preparation. Parsnips can seem quite forgiving but can also be temperamental or tricky to grow. They require enough space, sufficient moisture and good soil.
Positive selection: ( year 1) At harvest time positively select the best and most true to type roots selecting also for smooth skin texture and avoid rounded shoulders. Twist off or cut leaves at 2 cm above growing point. Only the best and disease free roots with single taproot in place should be selected and put aside for growing seeds.
Storage: Then store the parsnips in moist cool conditions, either in nets or sand which is ideal. Make sure to label clearly your selected and stored roots. Discard damaged or rotting parsnips during storage.
Year 2 (root to seed method) In the following spring plant out the stored roots in March / April so that the shoulders of the parsnips are level with the ground. Planting distances should be 30 – 45 cm apart in rows and 90 cm between rows.
Crop support: When the shoots are growing and the first flowers appear, support the plants with 5ft stakes at each end of the bed and place strong canes at 6 ft intervals in the row. Then tie several rows of string along the outside of the crop to keep stems in and supported.
Rouging: Any plants which fail to grow well, which look weak or are aphid insect infested should be pulled out and discarded before flowering . This is called rouging.
 Flowering and Seed harvest: During June and July the crop will continue to flower, and the first seed harvest can start in August depending on location, with manual harvesting taking place over several weeks. An indication of seed maturity can be seen by seeds starting to ‘separate out or splitting’. The primary and center bigger umbels will mature first and should be bronze brown in colour. These umbels are called the ‘kings head’ and carry bigger and better seeds. Use secateurs to cut umbels with about 3-4 inch of stem into paper sacks. Lay seed heads to dry on drying frames in a warm, dry and airy place. Keep harvesting all umbels as they mature. Keep primary umbel seeds separate for elite seed use. The entire parsnip seed crop can be harvested in one go cutting the entire plant, once the secondary umbels have matured or when 60% of the seed crop has matured. The harvested crop is then left to dry further indoors.
Caution when harvesting: Parsnip stems and leaves produce a toxin called furanocoumarin. When harvesting it is advisable to wear overalls or long sleeved shirts and gloves to protect the skin form direct contact as the toxin can cause a rash of the skin which can last for several weeks.
Threshing: Once seed heads have dried the seeds need to be separated from the stem material. The seeds shatter easily, and threshing can be done by wearing gloves, rubbing the umbels into a large container.
Cleaning: Sieve the seeds carefully using meshed sieves to separate out small stems, bits of leaf and soil. For larger scale and bulk seed cleaning the seeds are run through a seed cleaner**. When growing larger seed quantities SC** can help to facilitate bulk cleaning and grading. Once seeds have been cleaned and graded they should be stored in paper bags and labelled well. Seeds are mostly dry matter of up to around 85 %. It is therefore important that the seed storage is dry and cool to keep the seed from drawing in moisture. Parsnip seeds do not store well and generally won’t keep for longer than 2 years.
*Cage system. It is possible to grow several parsnip seed crops in close proximity by erecting a cage over the crop. Fine environmesh is used for the cage and bumble bee hives or blow flies are placed in the cage and are used to pollinate the crop. It is important to ensure no other flying insects can get in, checking that the netting is secure all round, as this will otherwise cause cross pollination deteriorating pure line varieties.
Elite seeds are seeds from positively selected plants and should be used for elite seed or standard seed production. There are approximately 300 – 500 seeds to the gram. Seed yield pr square meter aprox. 50 – 60 grams
Seed to seed method: elite seed should be sown later in the season, mid May – mid June and will give smaller plants. These plants can overwinter in the ground even if they freeze and be thinned out in the following spring to about 20 – 30 cm between plants and 75 – 90 cm between rows. Roughing should be done before flowering eliminating the smaller and weaker plants. The crop is otherwise treated in the same way as the root to seed method. Seed from the seed to seed method is called standard seed which is what generally is sold in seed packets.
For more in detail information see also: The Organic Seed Grower by John Navazio. ISBN 978-1-933392-77-6
**SC: www.seedcooperative.org.uk
Onions
 Onions: Allium cepa
The onion has its origin in the eastern countries of Afghanistan and Pakistan where wild species of onions still can be found. One of the ways it likely was brought to the middle east and Europe was via the silk route. Already in the Egyptian period was the onion well known and revered and the Romans used it widely. By the middle ages the onion was cultivated in much of Europe and was used both as a food crop and for medicinal purposes. Today the onion is one of the most important vegetable crops on the market.
Flower biology: Onions are perfect flower plants which carry stigmas and pollen in the same flower. The flowers are whitish to light purplish in colour depending on the varieties and the flowering will produce clusters of 6 triangular seeds in-cased within the florets similar to the leek. Onions are protandorous which means the pollen will be mature before the stigmas are receptive. This is the onions way to prevent self pollination.
Pollination: Onions are cross and insect pollinated and will cross with other onion varieties including shallots. They won’t cross with leeks however. They are biennial’s, flowering in their second year.
Isolation distance. Ideally a distance of up to 1600 meters should be observed between two different onion crops in flower. Especially when the bulbs are of different colours and shapes. However in more sheltered areas with hedges, trees and other barriers, a shorter distance of 800 meters can be used. Using cage systems* allows for more than one crop to be grown in close proximity.
Minimum number of plants. It is important to maintain the genetic diversity of the many different traits of onions. Onions don’t tolerate inbreeding very well so a population of ideally 80 – 100 plants for home grown situations and 150 plus plants for professional growing is recommended. However, the more plants the better.
Crop characteristics: It is important to know the characteristics of the onion variety you intend to save seed from, such as colour, width of neck, thickness of skin, bulbous shape, early, mid early or late maturing. These characteristics need to be considered when selecting. Remember you can-not save seed successfully from F1 hybrids to give you ‘true to type’ onions.
Agronomy. (Year 1) Good seed depend on good crop production and good crop production depends on suitable soil and soil preparation. Raise the onion crop as you would any production crop in the first year and importantly, pull out any bolting and off colour plants and keep the crop weed free.
Positive selection; (year 1) At harvest time lift and dry the crop making a first selection of the true to type plants which are specific to your variety before they get stored. Typically select up to 10% of the crop for seed then keep your selected onions separate and well labelled. The bulk of the crop or 90% is for fresh market or storage.
Storage of onion bulbs: The selected mother bulbs should be stored at between 2- 10 degrees Celsius. During the winter months it is important to look through and remove rotting or damaged bulbs including onions which sprout too early. Resistance to early sprouting / bolting is an important criterion.
 Seed production: (year 2) indoor. In March / April the bulbs should be transplanted level with the ground into a greenhouse at 20 – 30 cm between plants in the row and 75 – 90 cm between rows.
Crop support: The bulbs will begin to divide bringing forth several tubular stems, which reach between 3 – 4 ft in height each one producing a flower head. 5ft stakes are placed at each end of the row with 5ft canes at 6 ft intervals in the row. Then string is tied along the outside of the crop to keep stems in and supported.
Rouging: Any bulbs which fail to grow well and which look weak or bolt too early should be pulled out and discarded before flowering. This is called rouging.
Flowering and Seed harvest: Flowering takes place over a period of about 4 weeks with seeds reaching maturity 8 – 10 weeks after flowering. Watering during flowering is important to help seed set.
Seed harvesting: Once around 60 % of a seed head has matured manual harvesting can take place usually over several weeks. Harvesting is done using secateurs cutting 20 – 30 cm below the seed head. The extra stem will help to ripen the seed. Lay seed heads to dry on drying frames in a well aired space and turn the stems every few days. An indication of seed maturity can be observed by seeds turning black. (Seed photos)
Threshing and cleaning**: Once the seed is dry, threshing can be done by hand rubbing the seed heads gently and sieving out the stemmy material.
Make sure to label clearly the cleaned seeds, storing the seeds in paper bags.
Storage: Seeds are mostly dry matter of up to
around 85 %. It is therefore important that the storage of seeds is dry and cool to keep the seed from drawing in moisture. Onion seeds will only store for a couple of years so regular seed production is required to have viable seeds. Onion seed produced from positive selection will produce elite seeds and are used for further elite seed or standard seed production.
*Cage system. It is possible to grow several onion seed crops in close proximity by erecting a cage over the crop. Fine environ mesh is used for the cage and bumble bee hives or blow flies are placed in the cage and are used to pollinate the crop. It is important to ensure no other flying insects can get in, checking that the netting is secure all round, as this will otherwise cause cross pollination of pure line varieties.
There are approximately 400 seeds to the gram.
An onion seed crop can yield between 60 – 80 grams of seed pr sq meter depending on variety.
For more in detail information see also: The Organic Seed Grower by John Navazio. ISBN 978-1-933392-77-6
**SC: www.seedcooperative.org.uk
Leeks
 Leeks: Allium ampeloprasum var. porrum
The leek has its origin around the Mediterranean countries and North Africa where it had descended from its wild ancestors. It was widely cultivated and bred already in ancient Egyptian times. Both the Greeks and Romans were partial to the leek and it has been said that it was the Romans who first brought it to Britain and that after the 7th century it became the national symbol of wales. Some pound coins pictures the leek. It is in the family with the Middle Eastern cultivated Kurrat which is a smaller version of the leek.
Flower biology: Leeks are perfect flower plants which carry stigmas and pollen in the same flower. The flowers are light purple in colour and the flowering will produce clusters of 6 triangular seeds in-cased within the florets.
Pollination: Leeks are cross and insect pollinated and will cross with elephant garlic, kurrat and other leek varieties. They may also self fertilise but they won’t cross with onion. They are biennial flowering in their second year.
Isolation distance. Ideally a distance of up to 1600 meters should be observed between two different flowering leek crops. However in more sheltered areas with hedges, trees and other barriers, a shorter distance of 800 meters can be observed. Using cage systems* allows for more than one crop to be grown in close proximity.
Minimum number of plants. It is important to maintain the genetic diversity of the many different traits of leeks. But a minimum of 20 plants for home grown situations is to be recommended. For professional seed growing 100 plus plants would be best, however, the more the better.
Crop characteristics: It is important to know the crop characteristics of the leek variety you intend to save from seed, such as leaf colour, leaf stand, width and length of shank. These characteristics need to be considered when selecting within the crop. A lighter green leaf colour usually is associated with an autumn variety. Remember you can-not save seed successfully from F1 hybrids to give you ‘true to type’ leeks.
Agronomy. (Year 1) Good seed depend on good crop production and good crop production depends on suitable soil and soil preparation. Leeks are a fairly easy crop to grow also for seed and are quite hardy. Raise the crop as one would do a production crop and keep it weed free.
Positive selection; (year 1) Depending on whether your crop is an autumn or winter variety, at onset of harvest positively select your best and most true to type leeks by placing 4 ft canes by each plant
Outdoors : For outdoor seed harvest decide how many plants you intend to keep for seed. Usually planting distance of seed plants is 30 cm distance between plants in the row and 60 – 75 cm between rows. From this you can work out plants pr sq meter. Then earmark and prepare an area for transplanting your selected crop. The transplanting may only happen late in the season or late winter for example depending on climate and variety as you may be selecting for cold hardiness in winter leeks. Aim to have harvested between 5 – 10 % of your entire leek crop for seed.
Elite seeds are seeds from positively selected plants and should be used for elite seed or standard seed production.
Indoors: The leek crop can also be planted into a greenhouse or polytunnel planting at 20 – 30 cm between plants and 45 cm between rows. The non-selected or 90 % of the leek crop can be lifted and sold for the fresh market.
Crop support: Once you have all the plants in place with the shoots growing and the first flowers appearing, it is advisable to support them by placing single canes for each plant. Alternatively support the plants with 5ft stakes at each end of the bed and place 5ft canes at 6 ft intervals in the row. Then tie several rows of string along the outside of the crop to keep stems in and supported.
Rouging: Any plants which fail to grow well, which look weak or bolt too early should be pulled out and discarded before flowering. This is called rouging.
Flowering and Seed harvest: During the summer the crop will continue to flower. The leek flowers later than onions producing usually just one seed head and will take longer to mature delaying harvest till September. Once around 60 % of seed heads have matured manual harvesting can take place over several weeks cutting the entire plant with 30 – 45 cm of stem to allow the sap to continue to ripen the seeds. Lay seed heads to dry on drying frames in a well aired space and turn the stems every few days. An indication of seed maturity can be seen by seeds turning black.
Threshing: This can be done by hand by rubbing the seed heads gently and sieving out the stemmy material. SC** can otherwise can help with threshing the leek seed heads.
Make sure to label clearly the cleaned seeds, storing the seeds in paper bags.
Seeds are mostly dry matter of up to around 85 %. It is therefore important that the storage of seeds is dry and cool to keep the seed from drawing in moisture. Leek seeds do not have a long storage life and therefore may not keep for longer than 2 years.
Negative selection: Leeks lend themselves easily for negative selection. Instead of positively selecting the best specimens one rogues out approximately 10 – 20 % the weakest and not true to type plants including any damaged and poor looking plants. There is no transplanting to be done. Even a section of a larger leek crop can be put aside to go to seed. The crop remains in-situ for flowering and seeding.
Negative selection gives standard seed which is what is usually sold in seed packets.
*Cage system. It is possible to grow several leek seed crops in close proximity by erecting a cage over the crop. Fine environ mesh is used for the cage and bumble bee hives or blow flies are placed in the cage and are used to pollinate the crop. It is important to ensure no other flying insects can get in, checking that the netting is secure all round, as this will otherwise cause cross pollination of pure line varieties.
There approximately 400 seeds to the gram.
A leek seed crop can yield between 40 – 60 grams of seed pr sq meter depending on variety.
For more in detail information see also: The Organic Seed Grower by John Navazio. ISBN 978-1-933392-77-6
**SC: www.seedcooperative.org.uk